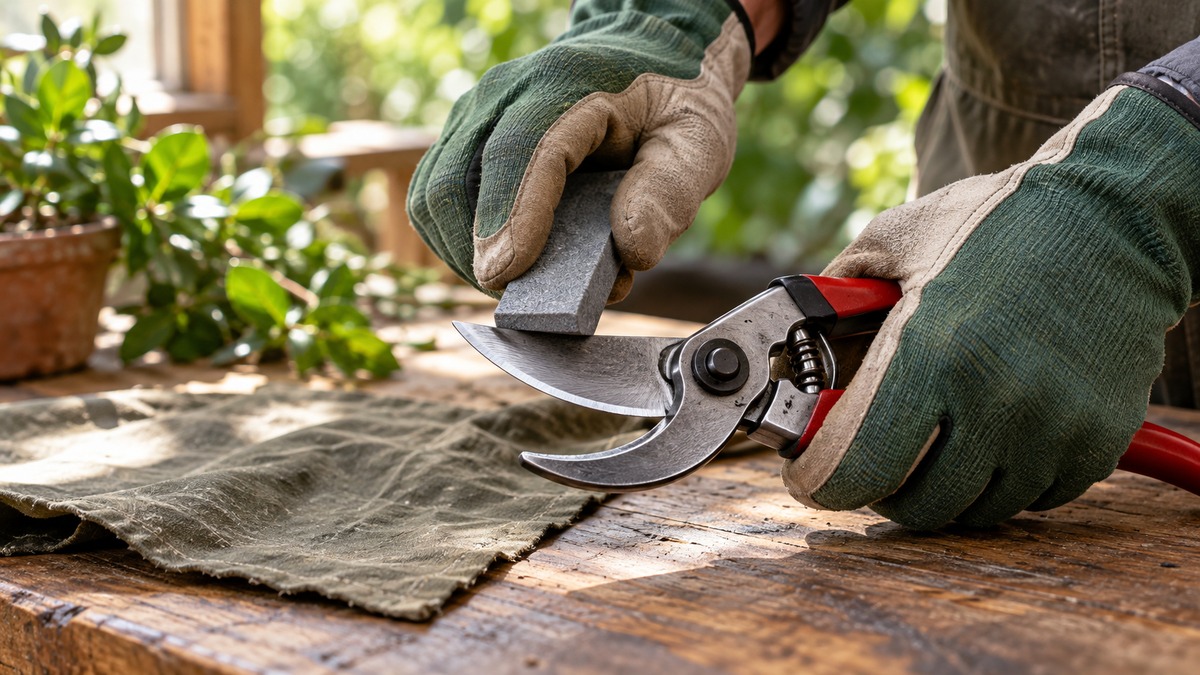
How to Sharpen Garden Pruners
As an Amazon Associate we earn from qualifying purchases.
Knowing how to sharpen pruners saves effort and protects the plant you are cutting. A dull blade crushes stems instead of slicing them, so every cut takes more force. The steps below draw on two university extension guides, a Washington State University Extension article and manufacturer advice from FELCO, and they mark the points where those pages differ.
Most of the work is preparation. Clean the blade, decide whether it needs a full sharpening, then respect the blade’s original angle. The sources give different angles and intervals, so each figure is shown with its source.
Quick answer
- Clean the blade first, because dirt and sap hide the true condition of the steel.
- Sharpen only the beveled side and match the factory bevel. FELCO gives 23 to 25 degrees, while K-State gives 10 to 20 degrees.
- Remove the burr from the flat side with one light stroke, then test the cut.
- Oil the pivot and blade, and store the pruners dry.
Decide whether the pruners need a full sharpening
Cutting tells you when a blade is dull. FELCO says: “When cuts begin to crush stems or require unnecessary force, the issue is rarely the plant.” University of New Hampshire Extension adds: “Dull pruning tools are likely to crush or tear plant tissue, increasing the likelihood of infection from disease organisms.”
The intervals differ. FELCO separates a quick touch-up, which it places “After every few hours of heavy use, or when you feel cutting resistance increase”, from a deep maintenance session “At least once per season”. K-State gives a single figure for well-maintained pruners: “Well-maintained pruners only need sharpening every six weeks, even with heavy use.” The two figures measure different things, so both are shown here.
Clean the blade before you sharpen
FELCO is firm on this point: “Never sharpen a dirty blade.” It explains that “Dirt, dried sap, and resin hide the true condition of the steel and accelerate wear on sharpening tools.” K-State advises: “Clean the tool with a scouring pad before sharpening, or rub with warm soapy water to remove plant sap, dried plant bits, and other debris.” For stubborn sap, K-State says “A solvent such as mineral spirits or kerosene can be used to remove sap.”
Washington State University Extension describes the everyday version: “Pruners are most easily washed with a nail brush or scrub pad using soap and water.” For rust, UNH says: “After wiping pruners dry, use coarse steel wool to work off any rust.” Clean metal shows the bevel clearly, and FELCO notes: “You need to see the shiny metal of the bevel to sharpen it accurately.”
Take the pruner apart if it comes apart easily
Disassembly makes the job easier. UNH says: “If your pruners are easy to disassemble, start there.” It explains why: “It is much easier to clean and sharpen a detached blade.” Take photos as you go. UNH advises: “Take pictures as you take apart your pruners to help you remember how to put them back together.” K-State says the same thing in plainer words: “Dismantle the tool and carefully lay out the parts in order.”
Not every pruner separates. K-State includes a figure caption that says: “This type of pruner would not be disassembled.” In that case, sharpen with the blade in place and keep the stone or file steady. Before you finish, check the parts you can see. FELCO asks you to “Check that the pivot bolt is secure but allows smooth movement”, and to confirm that “The cutting blade and anvil blade should pass closely without gaps.”
Find the factory bevel and match it
The sources agree on the method and disagree on the number. FELCO says: “For most high-quality bypass pruners, this bevel typically falls between 23 and 25 degrees.” K-State says to “Hold the file at the same angle as the beveled cutting edge, normally between 10 degrees and 20 degrees.” Neither page says why the figures differ, so the guide does not choose between them.
Both approaches say to match the blade as it leaves the factory. FELCO advises: “Lay the sharpening stone flat against the existing factory bevel”, keeping the angle steady. UNH says: “Be sure to set the file at the same angle as the factory beveled edge of the blade.” FELCO’s FAQ adds: “Rather than measuring the angle, match the sharpening stone to the existing bevel on the blade.” That is the practical approach: the blade already shows the angle you need to keep.
Sharpen only the beveled side
On bypass pruners, the sharp edge is one side only. FELCO says: “For bypass pruners and loppers, sharpen only the beveled side of the cutting blade.” It adds: “The anvil blade is not filed or sharpened.” Its warning is direct: “Avoid the flat side: Do not file the reverse side of the blade.”
K-State gives the same rule for the blade’s shape: “A curved type, scissor, or bypass pruner should be sharpened on the side away from the curved anvil.” It explains the risk: “Sharpening both sides damages the blade.”
Use smooth strokes in one direction
Direction matters more than force. UNH says: “Only sharpen in one direction starting at the inside of the blade and working outward.” FELCO describes the same motion: “Push from the heel toward the tip in smooth, even strokes.” It adds: “Do not move the stone back and forth.” K-State describes the motion as a shaving action: “toward the tip, as if you were trying to shave off a thin slice from the whetstone.”
K-State warns against heavy pressure: “Do not press too hard.” It gives a file method: “For best results, start with a coarse file and progress to the finest.” Its first step is simple: “First, pat the file with a moist cloth.” The cloth keeps the teeth clear, because “Water keeps the file from becoming clogged with tiny bits of metal removed from the blade during filing.”
The stroke counts also differ. FELCO recommends “Use 5-10 strokes with steady pressure, until a clean, even edge begins to form.” K-State says: “For well-maintained pruners, 10 to 20 draws with the file should be enough. Poorly maintained pruners need about 40 to 50 passes or may need to be taken apart completely.” The two counts describe different tools and methods, so use the figure that matches your stone or file and the condition of your blade.
Remove the burr from the flat side
Sharpening leaves a thin ridge, called a burr, on the flat side. FELCO’s method is one light stroke: “make one light stroke from the pivot toward the tip to shear off the burr without creating a bevel.” K-State finishes with a file: “Finish by running the extra-fine file over the back of the blade a few times to remove any burrs.” UNH says to “run a file with fine grit over the backside of the blade to remove any burrs.”
The guidance is the same in each case: remove the burr, but do not make a new bevel on the flat side. Removing it is what keeps the cut clean and the blade seated against its partner.
Do not take the edge too thin
A very fine edge is not always better. K-State says: “Do not reduce the beveled edge to less than 1-mm thickness.” It explains the trade-off: “A finer edge does not increase cutting ability, but rather makes the blade more fragile and prone to damage or breakage.” So aim for a sharp edge that holds up, not the thinnest possible one.
Test the edge before you reassemble
UNH gives a paper test: “Try cutting a piece of paper with the sharpened blade. If it makes a clean cut, the blade is adequately sharp.” K-State offers a light test: “Test blade sharpness by holding the cutting edge up to a light source. If light reflects off the edge, it hasn’t been adequately sharpened.”
K-State then suggests a branch test: “Next, try it on a branch of the right size for the tool.” Its rule for the result is clear: “If the blade pulls or catches when cutting, it is not sharp enough.” When the cut is easy, “If sharpened correctly, the cut will be easy and clean.”
Reassemble, adjust and lubricate
Put the pivot back together carefully. UNH says: “Reassemble your pruners, referring to the pictures you took earlier.” FELCO gives the adjustment rule: “Tighten the pivot nut until movement is smooth without play.” It adds: “The blades should pass cleanly without grinding or resistance.”
Lubricate after the edge is done. UNH says: “Finish by oiling your pruners to lubricate the moving parts and prevent the steel from rusting.” K-State recommends “a dry or silicone-based lubricant to repel water and to hinder rust and oxidation.” FELCO advises: “Apply a small amount of oil to the pivot bolt and spring to reduce friction”, which keeps the parts moving smoothly.
Choose a stone that suits the job
FELCO’s comparison sorts the tools by job. Diamond stones suit very dull or damaged blades. Carbide sharpeners suit quick field touch-ups. Natural stones suit fine honing and routine maintenance, and ceramic stones give a final polish. K-State adds a note on coarse stones: “Coarse stones typically are used to regain an edge after extended use.” It also says “The stone should be wet thoroughly before use”, so soak it first.
K-State also explains file grades: “The file cut refers to the fineness of the teeth.” Start coarse and move to finer teeth, as the file method above describes, rather than starting with the finest file on a dull blade.
Mistakes to avoid
- Sharpening a blade that still has dirt or sap on it, which FELCO says hides the true condition of the steel.
- Filing the flat side of a bypass blade, which FELCO says not to do.
- Pressing hard, which K-State warns against.
- Taking the edge down below the thickness K-State recommends.
- Skipping the burr check, so the blade does not seat cleanly against its partner.
- Reassembling without testing the cut on a branch.
Frequently asked questions
How often do pruners need sharpening?
K-State gives six weeks for well-maintained pruners, even with heavy use. FELCO suggests a quick touch-up after a few hours of heavy use and a deep session at least once per season, or sooner when the tool is very dull or dirty.
Should both sides of the blade be sharpened?
No, for bypass pruners. FELCO’s FAQ says: “only the beveled (angled) cutting side is sharpened.” K-State says that sharpening both sides damages the blade. FELCO’s FAQ adds that the reverse side is touched only lightly, to remove the burr.
What angle should be used?
The sources give different numbers. FELCO gives 23 to 25 degrees for most high-quality bypass pruners, and K-State gives 10 to 20 degrees. The practical rule both support is to match the existing bevel rather than measure it.
Can sandpaper replace a sharpening stone?
FELCO’s FAQ says: “Fine-grit sandpaper can work temporarily but is less precise and wears out quickly.” It recommends diamond, ceramic or natural stones for accuracy and blade life.
How can you tell the blade is sharp enough?
Use the paper test from UNH or the light test from K-State. If the blade cuts paper cleanly, or light does not reflect off the edge, and a branch cuts easily, the edge is ready.
How we chose
Four pages form the basis of this guide, all opened on 2026-10-22: the University of New Hampshire Extension article (dated January 13, 2018), Kansas State Research and Extension publication MF3288, the Washington State University Extension PDF (dated December 7, 2018), and FELCO’s own sharpening guide. FELCO is a manufacturer page, not an extension page, so it is used for technique and kept apart from the extension pages in the text. Commercial pages from the search results were left out, and FELCO’s product recommendations were not used.
What we could not verify
The pages cover common bypass pruners and loppers. None of them tests a specific model’s blade hardness or factory bevel, so this guide names no product and makes no claim about any model. The pages do not give a cost, a replacement interval for blades, or a figure for how many times a blade can be sharpened.
What the sources do not say
- The sources give two bevel angles, 23 to 25 degrees (FELCO) and 10 to 20 degrees (K-State), and do not explain the gap.
- They give different sharpening intervals, six weeks (K-State) and a touch-up after a few hours of heavy use (FELCO), which measure different things.
- They give different stroke counts, 5 to 10 strokes (FELCO) and 10 to 20 draws (K-State), for different tools and methods.
Bottom line
Clean the blade, match the factory bevel on the sharp side only, remove the burr with one light stroke, then test the cut and oil the pivot. For the next step in the garden, see preparing raised beds for winter, or plan spring crops with vegetables to plant in raised beds.
Sources
- https://extension.unh.edu/blog/how-clean-and-sharpen-your-pruners (opened 2026-10-22)
- https://bookstore.ksre.ksu.edu/pubs/mf3288.pdf (opened 2026-10-22)
- https://wpcdn.web.wsu.edu/extension/uploads/sites/57/2020/05/12-07-18_Garden-Tool-Care-Maintenance.pdf (opened 2026-10-22)
- https://eu.felco.com/blogs/news/how-to-sharpen-pruning-tools (opened 2026-10-22)