How to Grow Microgreens at Home
As an Amazon Associate we earn from qualifying purchases.
Learning how to grow microgreens at home takes one shallow tray with drainage, a clean growing mix, steady light and gentle watering. Four extension pages we opened agree on those basics. Two of them put the growing time at roughly three weeks or less. They differ on fertilizer, on whether seed needs a cover, and on how long the crop takes, so this guide shows those differences instead of smoothing them over.
Quick answer
- Use a shallow tray with drainage holes and a clean, soilless or sterilized growing mix. Skip garden soil.
- Scatter seed over the surface, keep the mix moist but not soggy, and give the seedlings about six to eight hours of light a day.
- Cut the greens just above the medium with clean scissors. Most of the timelines run about three weeks, but one page gives 10 to 12 weeks.
Choose the tray and the growing mix
Start with a shallow container that drains. Illinois Extension lists “a shallow container with drainage” as the basic kit, and the same release gives a shortcut for a home grower: “Takeout containers can even work, just remember to add holes in the bottom for drainage.” Purdue Extension describes a different setup, a matched pair of trays with one tray solid and one tray with holes, deep enough to hold about an inch of soil. Either way, the tray holds the mix and lets extra water leave.
For the mix, South Dakota State University Extension says: “You can use soilless potting mixes for growing microgreens, which are available at local garden retailers.” Purdue Extension names fresh, sterilized potting soil or coco peat as its traditional choice. Illinois Extension suggests a store-bought potting mix, or soil mixed with compost, added to the container about 2 inches deep. Two of the pages are clear about garden dirt. Cornell Cooperative Extension says: “Avoid growing in garden soil, manure or compost which may harbor bacteria.”
Pick seed and crops with care
Seed choice matters because you eat the young shoots. South Dakota State says that one of the most important considerations is to buy untreated seed. Cornell Cooperative Extension explains what makes a microgreen different from a sprout: “Microgreens differ from sprouts as they are grown in soil and only the above ground plant parts are consumed.” South Dakota State’s list of crops includes arugula, basil, beets, broccoli, cabbage, kale, mustard, peas and radish. Illinois Extension adds watercress and most kinds of lettuce to its list.
Not every vegetable belongs on the list. Illinois Extension says: “Plants in the Solanaceous or nightshade family, which includes tomatoes, eggplants, and peppers, should not be grown as microgreens due to toxins in the stems and foliage.” Keep that rule in mind when you pick a blend. If you want a ready-made tray and seed set, our seed starter kit guide lists the options that exist.
Sow, cover and wet the tray
South Dakota State gives a simple sequence. First, it says: “Begin by filling a flat or pot nearly full with a moistened growing medium.” Next: “Once the flat is filled, thinly scatter the seeds over the surface of the growing media.” Illinois Extension asks for denser sowing, because “seeds need to be planted densely” when the shoots are cut while they are still young.
The two extension pages disagree on covering. South Dakota State says: “Generally, you do not need to cover the seed, just press them down into the growing media with the palm of your hand.” Illinois Extension says: “After broadcasting a layer of seed, spread an additional thin layer of medium over the top to cover the seed and press down lightly to secure the seeds.” Both pages press the seed into the surface, and neither says which method gives a better crop. Pick one, write down what you did, and compare the next tray.
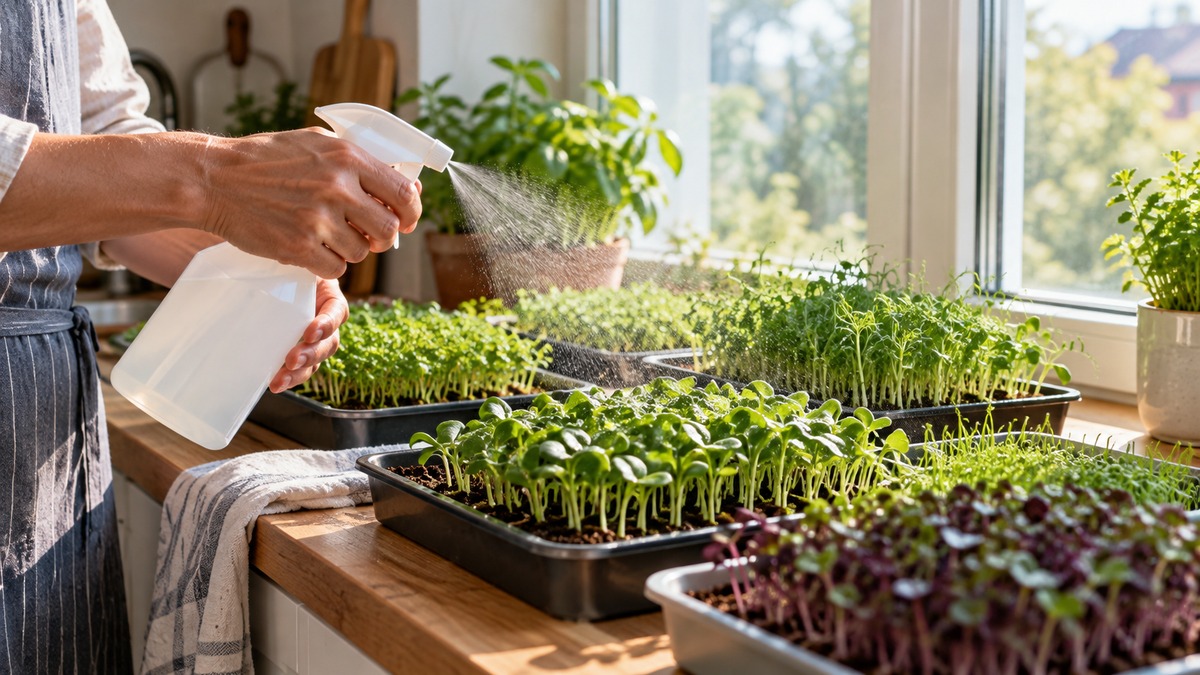
Wetting comes next. South Dakota State says: “It is important though to make sure the growing mix is thoroughly saturated with water after planting.” Illinois Extension asks for moisture without standing water: “Water the soil so it is moist, but not sopping wet.” Its daily check is simple: “Check the container daily to make sure the medium stays moist.” Illinois Extension also says you can spray the medium once or twice a day, or bottom water the container.
South Dakota State also suggests a humidity step for faster sprouting. The grower covers the flat with a plastic bag to hold the humidity near 100 percent, then removes the bag over a couple of days once the seeds come up. Cornell Cooperative Extension’s supply list includes a shallow container with a clear lid and drainage holes, so a covered tray is part of its method too.
Light, feeding and harvest timing
Light
Illinois Extension says: “Microgreens need about six to eight hours of light per day for optimal growth.” It prefers a sunny window and offers LED grow lights as the alternative: “A sunny, south-facing window is preferred.” South Dakota State accepts a sunny windowsill or supplemental lights: “You can grow them on a sunny windowsill or with supplemental lights.” If your window is too dim, the grow light options in our guide to grow lights for seedlings compare clip, stand and spectrum choices.
Feeding
The pages disagree most on fertilizer. South Dakota State advises feeding once the seedlings are up: “fertilize them with some half-strength, water-soluble plant fertilizer”. Illinois Extension describes the rate as low: “Rates for these fertilizers are low, around one teaspoon per gallon of water.” Purdue Extension takes the opposite view: “Fertilization is not needed to successfully grow MGs as the seed itself is a storehouse for all of the nutrients needed to produce the first, seed leaves (cotyledons) and emerging true leaves of microgreens.” South Dakota State also says to switch to plain water when the mix starts to dry.
When to cut
Timing is contested too. Purdue Extension says growers can harvest in just 7 to 21 days. South Dakota State says microgreens are usually grown only for about three weeks before harvest. Illinois Extension gives a much longer window: “Microgreens are ready to harvest in about 10 to 12 weeks.” The Illinois figure does not match the other two pages, and the release does not explain the gap. Plan for a range, and cut when the leaves show the stage the page you trust describes.
The stage itself is described differently too. Purdue Extension says: “Most crops (except pea shoots) are harvested when the plant is 2 to 4 inches tall and any true leaves are just emerging.” South Dakota State waits for leaves: “until they develop about three or four true leaves, which indicates they are ready to harvest.” Purdue also warns that “Generally speaking, MGs become bitter the longer they grow.”
Cut, rinse and store
South Dakota State says: “Harvest your microgreens with a clean scissors or a sharp knife, cutting them just above the growing medium.” Purdue Extension gives a measure for the cut: about a quarter inch above the soil line. Use clean scissors or a sharp knife for both. Wash only what you plan to eat, because Purdue says freshly harvested greens “can last about a week when stored unwashed in the refrigerator and washed right before eating.”
South Dakota State gives a similar window: “They are ready to eat immediately, or they can be stored in a plastic bag or container in the refrigerator for a week or so.” Cornell Cooperative Extension adds the storage step: “Store in a clean plastic bag in the refrigerator.” Together, the pages suggest that a bag in the refrigerator is the simple default, and that the greens should wait for washing until they are about to be eaten.
Reuse the tray
Cornell Cooperative Extension gives the reset step for a second crop: “After harvest, refill containers with fresh potting soil and sow new seeds.” Clean the tray before you refill it. Cornell also says: “Wash recycled containers with soap and water.” Purdue Extension notes that growing media is not reusable, which is one reason a fresh mix each round makes sense.
Keep the tray clean
Food safety has its own place in these guides. South Dakota State opens its planting advice with this line: “When planting and harvesting microgreens, always use good food safety practices.” Its first step is simple: “Wash your hands prior to planting seed and before harvesting the plants.” It also asks for “Use new or sanitized flats or pots and clean knives or scissors.” Purdue Extension sums up the principle: “As in food production, keeping all supplies clean and sanitized is the key to avoiding contamination from mold and pathogens.”
Purdue Extension adds a rule for soil: “Also, never use garden soil indoors unless sterilized first!” It also says that the thin root hairs that come off the seed are normal, while mold is not. Check the tray for visible mold as the crop grows, and treat that as a warning sign rather than a normal part of the crop.
Common mistakes to avoid
- Using garden dirt, manure or compost as the growing medium, which Cornell Cooperative Extension warns against.
- Skipping drainage. Illinois Extension says a takeout container can work when you add holes in the bottom.
- Growing nightshades such as tomatoes, eggplants and peppers, which Illinois Extension says should not be grown as microgreens.
- Letting the mix dry out or stay soggy. Illinois Extension asks for moisture without standing water.
- Waiting too long to cut, because Purdue Extension says the greens grow more bitter as they age.
How we chose
We started with extension pages that came up in a search for microgreens at home, and kept only pages hosted by a university, cooperative or county extension program. We opened four of them on 2026-10-22 and read each one in full before quoting anything. A Utah State University fact sheet also came up, but the page we reached gave only a short abstract, so we did not cite it. We set aside a newspaper column and a commercial blog because neither is an extension guide. We did not rank the four pages against each other. Each sentence in this guide was checked against the text of the page it names, and the places where the pages disagree are shown side by side.
What we could not verify
This guide relies on four pages, and they do not answer every question a grower will have. The pages we opened do not agree on harvest timing, on fertilizer, or on covering the seed, and the Illinois and Cornell pages do not agree on whether compost belongs in the mix. We did not find a source for yields, costs per ounce or the nutrition of the greens, so this guide makes no claims about those. Nothing here is a product recommendation.
What the sources do not say
The sources do not give a light intensity for a home window, and they do not explain how to choose a tray size for a given harvest. South Dakota State names shallow trays such as 1020 greenhouse flats, and says microgreens do not need a full greenhouse, but it does not say why one tray size works better than another. Illinois Extension lists soil mixed with compost as an option, while Cornell Cooperative Extension says to avoid compost, so check the label of any mix before you buy it. Fertilizer, cover and harvest timing remain open questions across these pages.
Frequently asked questions
Can microgreens grow on a windowsill without grow lights?
Yes, according to South Dakota State University Extension, which says you can grow them on a sunny windowsill. Illinois Extension also prefers a sunny, south-facing window, but it notes that microgreens need about six to eight hours of light a day. A dim window may need supplemental light to get that much.
Do microgreens need fertilizer?
The sources disagree. South Dakota State recommends half-strength water-soluble fertilizer after the seedlings come up, and Illinois Extension describes the rate as low. Purdue Extension says fertilization is not needed, because the seed carries the nutrients for the first leaves. If you choose to feed, the rate Illinois Extension gives is low, and South Dakota State suggests plain water once the mix starts to dry.
Is garden soil a good mix for microgreens?
The sources say no, or at least not without care. Cornell Cooperative Extension says to avoid garden soil, manure or compost, and Purdue Extension says never to use garden soil indoors unless it has been sterilized first. Purdue names sterilized potting soil or coco peat, and South Dakota State names soilless potting mixes, so those are the choices the pages point toward.
How long does it take to grow microgreens?
The answer depends on which page you read. Purdue Extension says a harvest in just 7 to 21 days, and South Dakota State says microgreens are usually grown only for about three weeks. Illinois Extension gives 10 to 12 weeks. Start by watching the true leaves develop, and cut when the seedlings reach the stage the page you trust describes.
How long do harvested microgreens keep in the fridge?
Purdue Extension says freshly harvested greens can last about a week when they are stored unwashed in the refrigerator. South Dakota State gives a similar window, saying they can be stored for a week or so. Store them in a clean plastic bag, as Cornell Cooperative Extension advises, and wait to wash them until you are ready to eat.
Sources
- https://extension.sdstate.edu/growing-microgreens-home (opened 2026-10-22)
- https://extension.illinois.edu/news-releases/small-mighty-microgreens-are-easy-grow-indoors (opened 2026-10-22)
- https://extension.purdue.edu/news/county/allen/2022/02/grow-microgreens-at-home.html (opened 2026-10-22)
- https://dlc.cce.cornell.edu/pluginfile.php/376604/mod_resource/content/1/Growing%20Microgreens%20-%20CCEOC.pdf (opened 2026-10-22)