How to Set Up Drip Irrigation for Trees
As an Amazon Associate we earn from qualifying purchases.
How to set up drip irrigation for trees starts with the root zone, not the hose. Utah State University and Oklahoma State University Extension both explain that a tree needs water spread under its canopy, and that the system must be sized for the tree it will become. This guide covers how to estimate the daily need, count emitters, set pressure and slope, and keep the system clean, using those two extension sources and one manufacturer drawing.
Quick answer
- Aim to wet at least half of the root area under the canopy, and 60 percent or more if you can. Utah State gives that target.
- Estimate the daily need with the Utah State formula, which uses plant area, a plant factor, daily evapotranspiration and system efficiency.
- Count emitters from soil texture. In the Utah State example, one emitter wets about 21 square feet of loam.
- Keep most systems between 10 and 30 psi, filter the water, and keep emitters above ground and spaced to avoid salt build-up.
Start with the root zone
The main goal is to wet the soil where the roots are. Utah State says that “The system must be able to wet at least 50% of the root area of each plant (60% or more is better).” It adds that “Root growth will be confined to moist soil.” If the wetted area is too small, “plants will become root-bound, like a large houseplant growing in a small pot.” That is why a drip system that only wets a small ring near the trunk does not do the job.
Oklahoma State defines the area to aim for. It says that “The dripline is simply the line marking the extent of the tree canopy coverage on the ground surface.” Utah State uses the area under the crown for its calculations, while noting that tree roots often reach past the crown edge. Treat the dripline as the minimum footprint, not the full root zone.
Design for the tree you will have, not the one you planted. Utah State says that “The drip system must be designed to meet the needs of a mature plant in the hottest time of the year.” A young tree needs less water, but the system should be able to meet the adult need when summer heat peaks.
Estimate the daily water need
Utah State gives a formula for the water a plant uses in a day. In plain words, gallons per plant equal 0.623 times plant area, times a plant factor, times the daily potential evapotranspiration, divided by the efficiency of the drip system. The page explains the constant this way: “This conversion factor is simply the gallons of water applied when you irrigate one square foot of ground with one inch of water.”
Plant area is the crown or dripline diameter squared, multiplied by 0.7854. The page’s example uses a 10 foot crown: 10 x 10 x 0.7854 = 78.54 square feet. The plant factor adjusts for how much water a type of plant uses. Utah State lists these values:
| Plant type, as listed by Utah State | Plant factor |
|---|---|
| Ground covers, flower beds, evergreens, some perennials, small shrubs under 4 feet, vines | 1.00 |
| Apples, cherries, walnuts | 0.85 |
| Mature shade trees (broadleaved trees) | 0.80 |
| Pecans, peaches, plums, pears, apricots, almonds | 0.75 |
| Native plants in semi-arid areas, some ornamental plants, large shrubs over 4 feet | 0.70 |
| Established low-water use native or other low water-use plants | 0.40 |
Utah State works one example for a shade tree with a 10 foot crown on a 0.25 inch per day evapotranspiration, with a 90 percent efficient system. Its result is “Gallons per day = 0.623 x 78.54 square foot plant area x 0.80 plant factor x 0.25 PET / 0.90 drip system efficiency = 10.9 gallons per day used by this tree.” The page also notes that “Your local Extension office may know the PET, even on a week-by-week basis.” Use that local figure when you have it.
Oklahoma State takes a different route to a similar answer. Its example is a peach tree with a 12 foot canopy using water at 0.24 inches per day, and it says that “drip irrigation must replace 18.8 gallons of water per day.” Both examples show the same pattern: a bigger canopy means more water, and the final number depends on the local weather rate. Efficiency belongs in the math too. Utah State says that “Most drip systems are 85 to 90% efficient; 85 to 90% of the water applied is actually used by the plant.”
Count the emitters
Soil texture decides how far each emitter spreads the water. Utah State gives a wetted area for each texture, and our table turns those figures into a simple range:
| Soil texture (Utah State) | Area wetted by one emitter (sq ft) |
|---|---|
| Sandy | 5 to 21 |
| Loam | 21 to 65 |
| Clay | 65 to 161 |
The page’s sample count shows how the numbers combine. Utah State says that “Area wetted per emitter is 21 square feet (loam soil, conservative figure).” For a 15 foot crown on loam, with the goal of wetting 60 percent of the root area, the plant area is 176.71 square feet. Our arithmetic is 176.71 x 0.60 / 21, which is about 5 emitters. Utah State says that “These 5 emitters would be distributed evenly under the tree’s crown.”
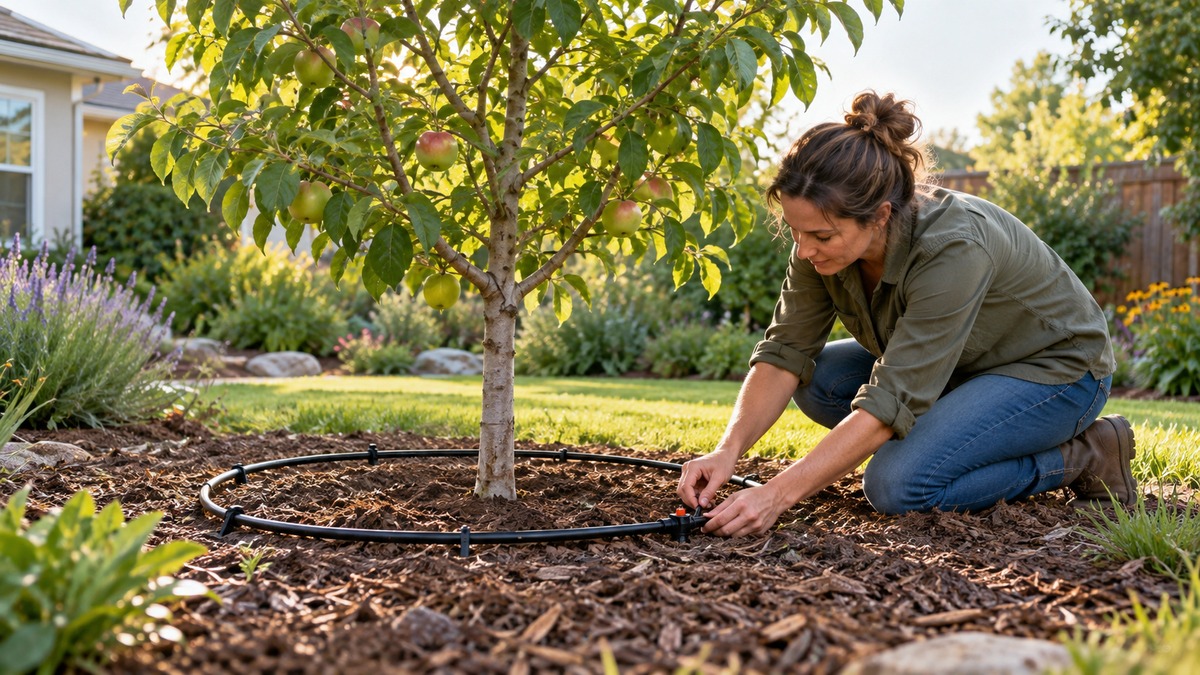
Oklahoma State adds a point about placement and growth. It says that “Emitters for trees should be located to provide balanced root development.” It also says that “The emitters should be placed out near the canopy dripline, equally spaced around the tree.” Both pages place emitters around the tree rather than in one spot at the trunk. Oklahoma State adds that “While a single, small capacity emitter may be sufficient during the early years of plant development, a higher flow rate will be needed as the tree matures.” Plan for the later flow from the start by using several emitters, which is what the page recommends: “This large flow should be divided between several emitters, spaced around the trunk within the canopy dripline.”
Emitter flow is the last variable. Oklahoma State says that “Most deliver either 1/2 gallon per hour (gph), 1 gph, 2 gph, or 4 gph at their design operating pressure.” Divide the daily need by the number of emitters and their flow to find the run time, which the next section covers.
Set the pressure and handle slopes
Most drip systems need steady pressure. Utah State says that “Most drip systems operate at 10 to 30 PSI.” Its design note is direct: “Pressure regulation may be needed.” It also says, “Consider elevation changes.” The reason is that “For every foot of elevation change, pressure changes by 0.433 PSI (increases as elevation drops, or decreases as elevation rises).”
Oklahoma State gives the same effect in a different unit. It says that “For every 2.31 feet of elevation fall the pressure on water in a pipe will increase one pound per square inch (psi).” The two figures agree: 2.31 feet per psi is about 0.433 psi per foot. A tree on a slope will see different pressure at each emitter, so measure the height difference before you lay the lines.
Oklahoma State offers two fixes. It says that “Areas of a field at different elevations should operate as separate sub-units with separate pressure regulators.” Pressure compensating emitters are the other option. The page says that “Pressure compensating emitters require no pressure regulator, but are substantially more expensive to purchase than ordinary emitters.” It adds that “Most pressure compensating emitters maintain an acceptable uniformity of discharge in the operating range of 10 psi to 30 psi.”
Layout on a slope matters as well. Oklahoma State advises that “Laterals should run across slope, following contour lines, or run slightly downhill.” It also sets a uniformity target: “There should be no more than a 10 percent variation in discharge between the emitters with the lowest and highest output.” The manufacturer’s drawing for trees on a slope, dated 2020, gives a related limit. It states a maximum elevation change of 14 feet without an additional PVC check valve.
Keep the water clean
Water quality is the weak point. Oklahoma State says that “Water quality and filtration are probably the most serious concerns when considering drip irrigation.” The reason is the emitter size: “In order to discharge very low flow rates, the diameter of the emitter orifices must be very small.” Utah State puts it more briefly, saying that clean water matters and that “filtration often is needed.”
Backflow protection is a separate job. Utah State says that “Special low pressure backflow preventers should be used when connecting to culinary water systems.” Treat that as a rule for any connection to the household supply. If the drip line is fed from a hose bib, check the fittings first, and see our guide to garden hose to drip irrigation adapters for the hose side of the connection.
Keep emitters above ground and away from salt
Placement at the surface has two reasons. Utah State says that “Emitters must be spaced to avoid toxic salt build-up around plants.” It also says that “Emitters should be above ground.” The page gives the reasons: “This allows visual inspection to see that the system is working.” and “It also prevents root intrusion into emitters.”
Visual checks are part of the design. Utah State says that above-ground emitters allow “visual inspection to see that the system is working”, so walk the line on a regular schedule and look at each emitter before the hot season.
Set the run time and schedule
Utah State ends its guide by pointing to the schedule. It says that “Once you have calculated the amount of water and the number of emitters needed, you will need to decide on an emitter size (flow per unit of time) on a watering schedule (how long you irrigate and how often) that will deliver the needed amount of water.” It adds that “Factors like the infiltration rate of your soil and the timing and duration of your water availability will need to be considered.”
Oklahoma State gives the run-time formula. It says that “The required operation time per irrigation will be given by:” and then divides the daily water requirement by the number of emitters times the emitter flow rate. Using the peach example from earlier, 18.8 gallons a day, four emitters at 2 gallons per hour each, gives 18.8 divided by 8, or about 2.35 hours a day. That figure is our arithmetic from the page’s example, and the page’s own table is for other crops. If you start with a hose before you install the drip line, see our guide to hose attachments for watering plants.
Common mistakes to avoid
- Sizing for the young tree. Oklahoma State says a single small emitter may be enough early on, but the flow must rise as the tree matures.
- Putting every emitter at the trunk. The same page says to spread the flow around the trunk, within the dripline.
- Ignoring the slope. Utah State gives a change of 0.433 psi per foot of elevation, and Oklahoma State gives 2.31 feet per psi.
- Burying the emitters. Utah State says emitters should be above ground so the system can be checked and roots cannot grow into them.
- Skipping the filter. Oklahoma State says filtration is probably the most serious concern in drip design.
How we chose
The main source is the Utah State University Extension page on drip irrigation for trees, opened on 2026-10-22, because it is written for trees and gives a worked method. Oklahoma State University Extension fact sheet BAE-1511 on drip irrigation systems, also opened on 2026-10-22, supplies the emitter placement, pressure and filtration points. The manufacturer drawing for trees on a slope is the third source, and it adds only the slope note. Each quoted sentence was matched against the text of its page, and the arithmetic is labelled as ours.
What we could not verify
The pages give a method, not a finished plan for any one yard. We could not check how a specific tree species responds to a given emitter flow, and the pages do not give a watering schedule by season. This guide does not name products, prices or brands, and it does not check any emitter, valve or filter for performance.
What the sources do not say
The Oklahoma State fact sheet is written mainly for field crops and orchards. Its lateral-length tables are built around grapes and pecans, not landscape trees, so they are not used here. The manufacturer drawing is a short layout note and does not explain its reasoning. The pages do not say how much extra water a newly planted tree needs, and they do not give the life of drip tubing or the cost of a system. The Utah State evapotranspiration figures are for Utah, and the page asks readers to check local figures.
Frequently asked questions
How many emitters does one tree need?
It depends on soil and crown size. In the Utah State example, a 15 foot crown on loam, aiming for 60 percent of the root area, needs about 5 emitters. Sandy soil wets less per emitter, so it would need more.
How much water does a tree need each day?
Utah State’s sample shade tree with a 10 foot crown uses about 10.9 gallons per day under its assumptions. Oklahoma State’s peach example with a 12 foot canopy needs 18.8 gallons per day. Use your own canopy size and local evapotranspiration to get your number.
What pressure should a tree drip system run at?
Utah State says most drip systems operate at 10 to 30 PSI. Oklahoma State says that “Typical operating pressures for drip tubing range from 6 psi to 12 psi.” It also says that most pressure compensating emitters hold a steady output between 10 psi and 30 psi.
Should drip emitters be buried?
No. Utah State says that “Emitters should be above ground.” That lets you check the system and keeps roots from growing into the emitters.
How long should I run the system?
Run it for the time that delivers the daily need. Oklahoma State gives the formula, which divides the daily requirement by the number of emitters times their flow rate. Adjust that time to the weather, because Utah State lists the soil infiltration rate and the timing of water availability as factors to consider.
Sources
- https://extension.usu.edu/forestry/trees-cities-towns/tree-care/drip-irrigation (opened 2026-10-22)
- https://extension.okstate.edu/fact-sheets/drip-irrigation-systems (opened 2026-10-22)
- https://rainbird.com/media/12355 (opened 2026-10-22)