How to Set Up Drip Irrigation for Raised Beds
As an Amazon Associate we earn from qualifying purchases.
How to set up drip irrigation for raised beds comes down to three choices: the type of tubing or emitter, the spacing of the emitters, and the pressure the system runs at. Clemson Extension suggests soaker hoses or drip emitters for small gardens and raised beds, and drip emitter tubing or drip tape for longer rows. Spacing should follow your soil, since sandy soil needs closer emitters and shorter, more frequent watering. The notes below also cover pressure limits, keeping the tubing in place, and how to tell whether a bed is getting the water it needs.
Quick answer
- For small raised beds, use soaker hoses or drip emitters. For longer rows, use drip emitter tubing or drip tape.
- Space emitters closer in sandy soil. Clemson gives 6 to 10 inches for annual vegetables in sandy soil and 8 to 12 inches in clay.
- Set a pressure regulator. Clemson gives 25 psi for soaker hose and emitter systems and 10 to 12 psi for drip tape.
- Cover the tubing with mulch or anchor it, so wind or animals cannot move it.
What a raised bed system needs
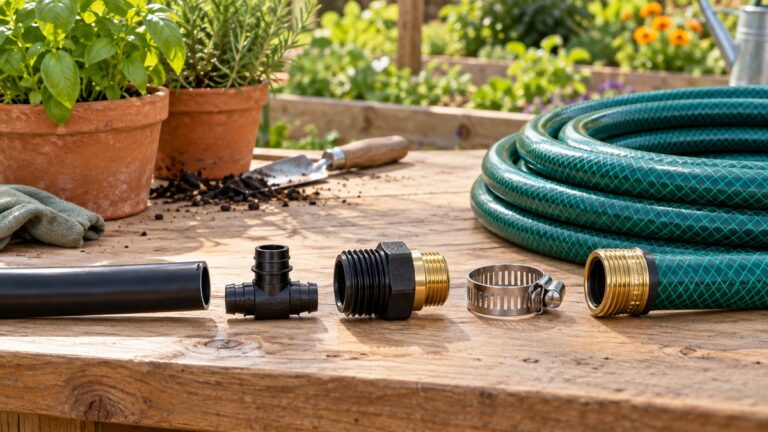
Clemson lists the parts of a home system: “Important components: A water source, distribution line, filter, pressure regulator, fittings, and a soaker hose, drip emitters, drip emitter tubing, or drip tape.” The choice of parts starts with the bed, because the factsheet says to choose a system based on “Garden or bed size, plant spacing, soil type and texture, and water source.”
Two parts deserve attention. The filter keeps the emitters clear, since it helps “prevent debris from entering and blocking emitters.” The regulator protects the whole line, because it is “Needed to ensure that water pressure, whether from a well or municipal source, does not damage the irrigation equipment.” Skipping either part leaves the emitters and the tubing exposed to problems the factsheet names.
Spacing by soil type
Clemson’s table ties emitter spacing to the soil. It also covers perennial fruit and woody plants, so use it as a starting point and adjust for the plants you have.
| Plant type | Sandy soil | Clay soil |
|---|---|---|
| Annual fruits and vegetables | 6-10 inches | 8-12 inches |
| Perennial fruits | 12 inches | 24 inches |
| Ornamental trees and shrubs | 12 inches | 24 inches |
The reason is how water moves. “In sandy soil, water tends to move down through the soil profile much faster than in clay.” In clay, “water spreads laterally in clay soil much more than in sand.” Clemson sums up the adjustment: “Sandy soil generally requires closer emitter spacing and shorter, more frequent irrigation windows.” For heavier ground, “Heavier clay soil may use wider emitter spacing and longer, less frequent irrigation windows.”
Choose the emitter for each bed
The AE524 publication notes that “Microirrigation systems can be customized to accommodate different plant types, soil conditions, and landscape layouts, making them ideal for home gardens, flower beds, shrubs, and vegetable plots.” That flexibility helps when beds differ in shape and in what they grow.
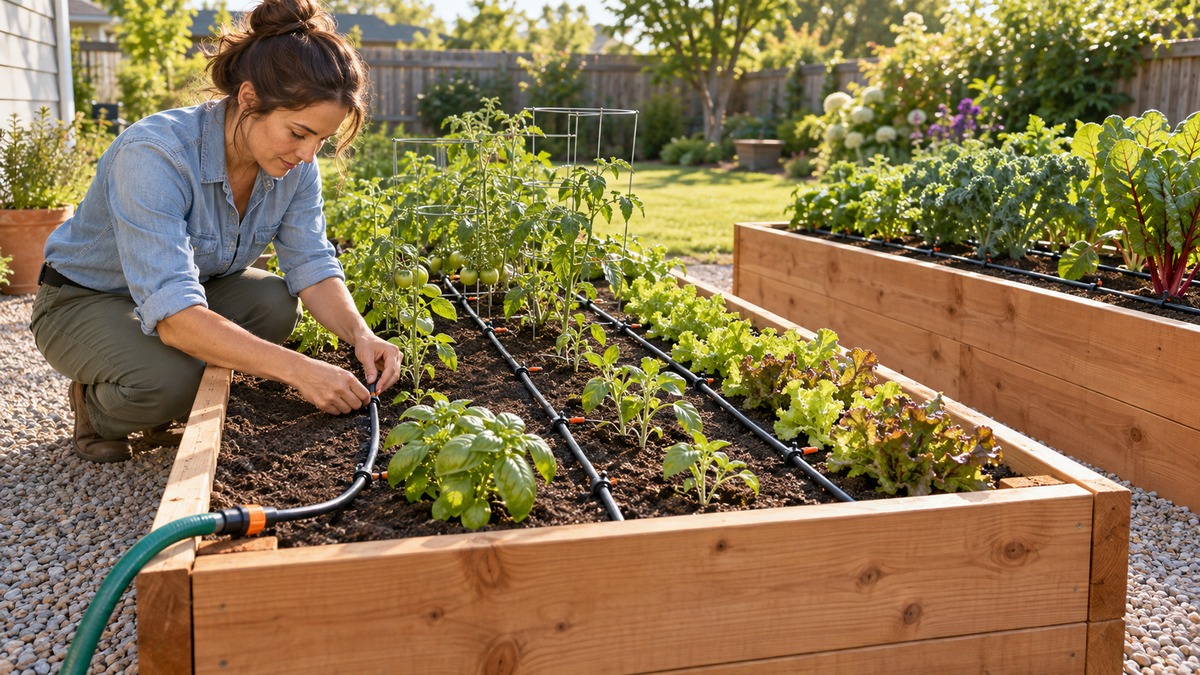
Soaker hoses are the simplest start. Clemson says they “slowly release water through pores along the length of the hose,” and that they “are less precise than other systems, but are the simplest to install as they attach easily to water spigots and other hoses.” The same factsheet adds that “Soaker hoses are best for irrigating small areas.” Its comparison table lists the soaker hose flow as “0.5-1 gallon/foot/hour,” with a best use of “Small home gardens, raised beds.”
Drip emitters suit beds where each plant has its own spot. Clemson says that “Drip emitters are very efficient as they can be inserted at the base of each plant, precisely where water is needed.” Utah State University gives the two basic types: “Point source emitters are individually placed at the base of a plant to maximize water efficiency by only irrigating individual plants.” Its other type fits a grid: “Inline emitters are spaced evenly along a pipe or hose so there is an emitter every 6 or 12 inches, for example, and are often laid in a grid pattern.”
For longer rows, tubing and tape take over. Clemson describes emitter tubing as “a thick, durable tube with evenly spaced emitters at 6 to 24 inches,” while “Drip tape is similar to drip emitter tubing, but the tubing is much thinner, making it less expensive per unit.” Utah State also marks the difference in life span: “Both drip tape (temporary) and drip line (more durable and permanent) are examples of inline emitters.” The AE524 publication adds that “In-line emitter tubing has evenly spaced holes, so it’s important to position them near the base of the plants being watered.” It also says in-line tubing “is suitable for rows of plants, groundcovers, and vegetable gardens.”
Microsprays are a fourth option for beds with mixed plantings. They “must be installed above the soil surface or mulch,” and the UF/IFAS publication notes that emitter spacing “can be customized to match the plant layout, which is particularly effective for annual bedding plants.”
Set the pressure
Clemson’s regulator guidance is the one to follow: “Use regulators appropriate for the type of system being installed (25psi for soaker hose/drip emitters, 10 to 12psi for drip tape).” The UF/IFAS publication for small vegetable farms gives the same drip tape range: “Drip systems require low operating pressure (20-25 psi at field entrance, 10-12 psi at the drip tape) compared to overhead systems (50-80 psi).” That document is written for farms, so treat its numbers as a cross-check, not a replacement for the regulator’s own rating.
The AE524 publication describes the same low-pressure idea for home systems. Microirrigation uses “low pressure and low flowrates (usually 15 psi or less and 60 gph or less).” Check the rating on the parts you buy against these figures, and treat any mismatch as a reason to ask the product’s maker before you connect the line.
Lay the tubing and plan the wet area
A bed does not always wet evenly from one line. The UF/IFAS publication reports that, on Florida’s sandy soils, “the wetted width seldom exceeds 18 inches (1.5 ft) when a single drip tape is used.” The same document gives a practical rule: “The actual wetted width should be used in place of the bed width.” For heavy soil, one drip tape in the middle of the bed may be enough: “In heavy soil, it is reasonable to assume that a drip tape installed in the middle of the bed will be sufficient to wet the entire bed width.” For sandy soil, plan closer emitters or more lines, as Clemson advises.
Plant placement matters too. “If emitter spacing (too far apart) does not match the planting pattern, root development may be restricted and/ or plants may die.” The AE524 publication offers the fix: “Alternatively, emitter spacing can be customized to match the plant layout, which is particularly effective for annual bedding plants.” For the filling step that comes before the tubing, see the guide to filling raised beds.
Cover the tubing and keep zones separate
Tubing lying on top of a bed can move. “Drip tubing may be lifted by wind or may be displaced by animals unless the drip tape is covered with mulch, fastened with wire anchor pins, or lightly covered with soil.” Pick the cover that suits your bed, then walk the bed after a windy day to see whether anything has shifted.
Keep the zones clean as well. The AE524 publication says “Always remember to keep like sprinkler heads in the same zone and never mix different types.” It also says “Microirrigation emitters should not be combined in the same zone with rotors or pop-up spray heads.” A raised bed on drip should therefore sit on its own zone, away from lawn sprinklers.
For the timer, AE524 describes a simple option: “Microirrigation can be installed with a battery-operated timer on an outside hose bib or attached to an existing inground automated irrigation system.” For the hose connection, see garden hose to drip irrigation adapters.
Checks after setup
Once the system runs, inspect it. “Frequent inspection is key for any microirrigation system.” The publication also advises you to “Turn on the system frequently and inspect it while it is operating.” Watch for wet and dry patches, and for plants that look unhappy, since the publication tells you to “Look for wet/dry soil and decline in plant health.”
Check the flow as well as the timer. Utah State notes that “When using drip, it is hard to know how many inches of water are delivered every hour with emitter flow rates listed in gallons per hour.” Its tables list the time needed to apply half an inch of water for drip tape and drip line, so use them when you set run times.
Common mistakes
- Spacing emitters by habit instead of by soil. Clemson’s table gives different spacing for sandy and clay soils.
- Running drip tape at the pressure meant for soaker hoses. Clemson lists 10 to 12 psi for drip tape and 25 psi for soaker hose and emitter systems.
- Leaving tubing exposed on the surface, where wind and animals can move it, according to UF/IFAS.
- Counting the bed width as the watered width. The UF/IFAS publication says to use the actual wetted width.
- Skipping the filter. Clemson lists it among the important components, and debris can block emitters.
- Putting spray heads and drip lines on the same zone, which AE524 says to avoid.
How we chose
We chose the points that university and state extension pages state directly, and we left out vendor pages, kit listings and retail specifications. The four sources are a Clemson home garden factsheet, a UF/IFAS microirrigation publication for home landscapes, a Utah State extension page on vegetable water needs, and a UF/IFAS publication written for small vegetable farms. The farm publication was used only for its pressure and cover points, and that context is named where it appears. Each source was opened on 2026-10-21.
What we could not verify
Drip irrigation depends on the bed, the plants and your water supply, and the four sources do not settle every question.
What the sources do not say
- How long to run a home raised-bed system in minutes. The sources give flow rates and a time to apply half an inch on a 100-foot row, but not a schedule for a home bed.
- How many emitters a bed needs for a given number of plants. The sources give spacing ranges, not counts.
- The water pressure at your own faucet. The regulator figures are ratings to match, not readings from a home supply.
- How to build the frame of a raised bed, which these pages do not cover.
- The soil in your own bed. The Clemson table uses only two soil types, sandy and clay, so loam and mixed beds need a judgment the sources do not give.
Frequently asked questions
How far apart should drip emitters sit in a raised bed?
Clemson’s table gives 6 to 10 inches for annual vegetables in sandy soil and 8 to 12 inches in clay. The factsheet also describes emitter tubing with emitters at 6 to 24 inches, so read the spacing printed on the product you buy.
Do soaker hoses work in a raised bed?
Yes, for small areas. Clemson says soaker hoses are best for irrigating small areas, and the AE524 publication lists raised beds among the places where soaker hoses are best suited.
What pressure should a drip line run at?
Clemson gives 25 psi for soaker hose and drip emitter systems and 10 to 12 psi for drip tape, and says to use the regulator that matches the system. AE524 describes microirrigation as usually 15 psi or less.
Why does the wet area matter more than the bed width?
The UF/IFAS publication says the actual wetted width should be used in place of the bed width. On Florida’s sandy soils, research shows the wetted width seldom exceeds 18 inches for one drip tape, so a wide bed may need more than one line.
How can you tell whether the tubing is working?
Check the bed while the system runs, and look for wet and dry patches. AE524 says to inspect the system “while it is operating,” and to look for “wet/dry soil and decline in plant health.” The sources do not give a single reading that signals a failed line, so the check is visual.
Sources
- https://hgic.clemson.edu/factsheet/installing-drip-irrigation-in-home-gardens/ (opened 2026-10-21)
- https://edis.ifas.ufl.edu/publication/AE524/pdf (opened 2026-10-21)
- https://extension.usu.edu/irrigation/aic/research/water-recommendations-for-vegetables.php (opened 2026-10-21)
- https://edis.ifas.ufl.edu/publication/HS388/pdf (opened 2026-10-21)