How to Make Leaf Mold From Fallen Leaves
As an Amazon Associate we earn from qualifying purchases.
If you want to know how to make leaf mold at home, the short answer is simple. Shred or chop fallen leaves, moisten them, keep them in a bin or a loosely closed bag, and let them rest. Leaf mold is slower than a hot compost pile, and the sources we opened give timelines from about six months to two years. The steps below cover the setup, the airflow and moisture checks, and how to tell when the leaves are ready.
Leaf mold is decomposed leaves, and it needs little beyond leaves, water and time. The sources give two reasons to make it: it keeps leaves out of the bag, and it returns them to the garden.
Quick answer
- Shred the leaves, moisten them, and keep them in a bin, cage or loosely closed bag.
- Expect a long wait. The sources give timelines from about six months to two years, depending on how the leaves are prepared.
- Leaf mold is ready when it is soft, crumbly and smells earthy.
What leaf mold is and why it is worth making
The Illinois Extension release says the end result “is referred to as leaf mold or partially decomposed leaves.” Penn State describes it as “dark brown in color, with a pleasant earthy smell and a crumbly texture.” The Clemson county extension calls the process “a lengthier (3 months up to 1 year), yet relatively straightforward process.”
The reason to bother is the leaves themselves. Penn State notes how odd the usual routine is: “It seems strange that in the fall, we rake leaves to put into plastic bags or to the curbside to be hauled away for disposal somewhere else.” Penn State then offers two methods: “One is shredding the leaves to make mulch or to let them break down into the lawn, and the other is piling whole leaves to transform into leaf mold.” This guide covers the second method.
Shred the leaves first
Shredding is the step that changes the timeline most. The Illinois release says “Brown leaves break down faster if they are shredded and moistened.” Penn State puts it more bluntly: “Shredded leaves decay much more quickly than whole leaves.” The Ask Extension answer explains what to aim for: “The most important thing about shredding leaves is to cut them into fine pieces,” since “The finer the leaves are shred the faster they will break down.”
Whole leaves cause problems in other uses too. The Illinois release warns that if un-shredded leaves are applied as mulch, “they tend to mat together and suffocate the soil or vegetation.” The sources do not require a particular tool for shredding. They ask for small, finely cut pieces, and that is the target to aim for however you get there.
Choose a container: bin, cage, bag or loose pile
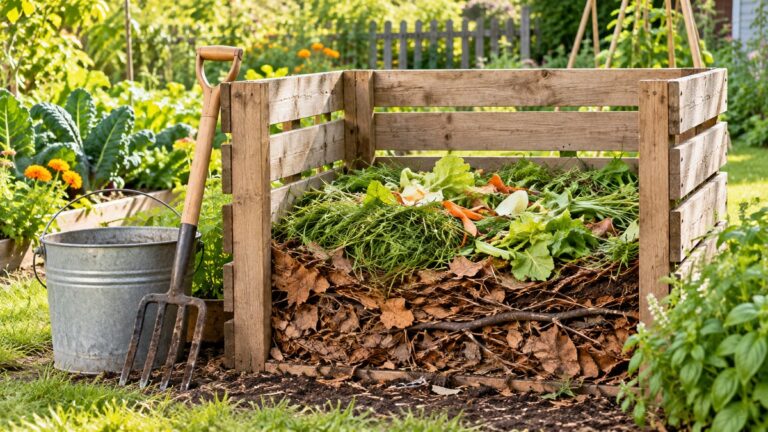
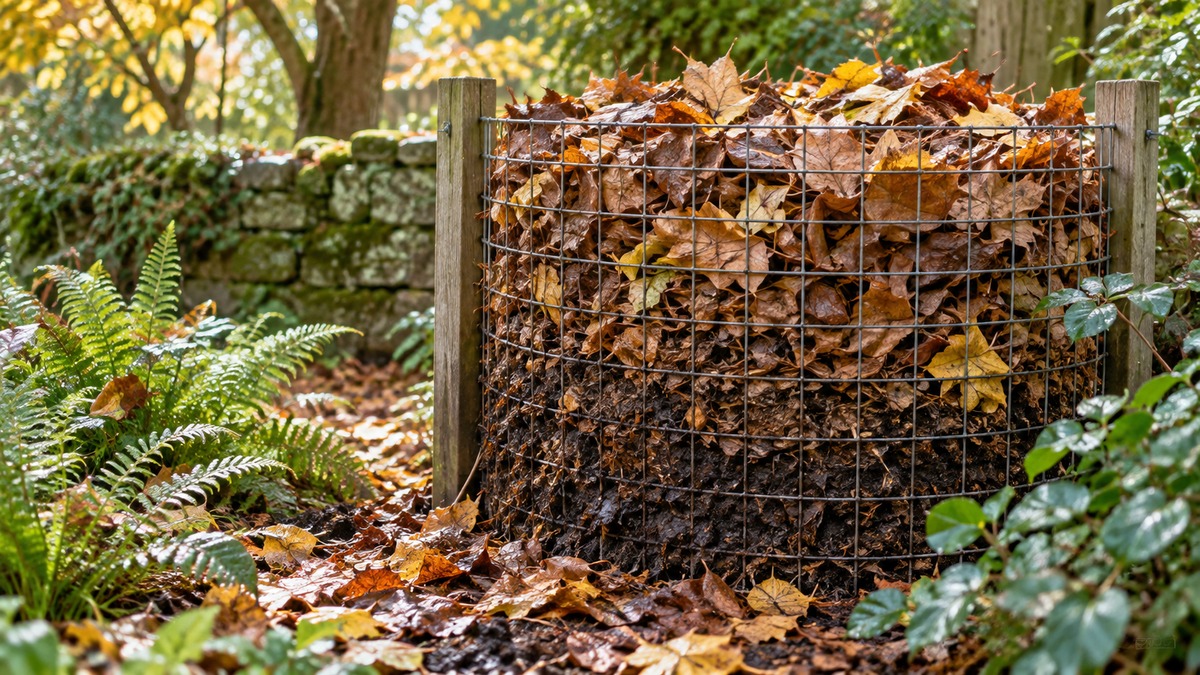
A bin is the most forgiving choice. Penn State says that “Although not essential, a wood or wire bin, 3 to 6 feet in diameter and at least 3 feet in height, helps keep the leaves contained.” The Dublin City Council leaf mould guidance gives a metric size for cages: “Cages should be a minimum diameter of 1.5m and can be as large as 3m in size.” The same guidance says to “Build a large enough bin or pile so it can more easily retain moisture needed so sustain the leaf moulding process.” Size matters for moisture, not only for holding the leaves.
A bag is the smallest option. Penn State lists a large plastic bag as one possibility, and the Illinois release describes “storing them in garbage bags with small holes that allow leaves to break down naturally.” The Ask Extension answer gives the bag steps: after shredding, put the leaves in black trash bags, moisten them, close the bag, and “poke a few holes into the sides of the bag for aeration.” The Dublin guidance stresses a large enough bin or pile, so a bin suits a bigger batch better than a bag. If you also want a bin for kitchen scraps, see our guide to starting a compost bin.
A loose pile works too. Clemson’s guidance is short: “Pile leaves up, add water, and turn them occasionally (once or twice every month) to create leaf mold compost.” The Dublin guidance adds a placement rule. Keep cages and bins away from ivy, bindweed and brambles, since those weeds can invade the pile and contaminate the leaf mold. If the pile sits under a tree, the same guidance suggests placing layers of cardboard or a woven weed barrier underneath to keep tree roots out.
Keep the leaves damp and let them breathe
Moisture and air both matter, and the two pull in different directions. Penn State gives the bag routine in one line: “Fill the bag or can with leaves, moisten the leaves, close it up loosely (allow some airflow), and let it sit.” The word “loosely” is the point. A tightly sealed bag cuts off air, and the Ask Extension answer warns what that produces: “If your leaf litter is not getting enough air it will have an anaerobic sulfur smell.”
For a pile, Penn State’s method is to “form a pile of leaves, pack them down, water them, and wait a couple of years.” Packing and watering set up the starting moisture. In dry weather, the Dublin guidance suggests covering the pile: “Piles can be covered with black plastic to retain moisture in drier summer months.” The cover is for dry weather, and the air warning above still applies.
How long it takes: the sources disagree
The timelines in these sources do not match, and the table keeps each figure next to its setup.
| Source | How the leaves are handled | Timeline the source gives |
|---|---|---|
| Ask Extension answer | Shredded, moistened, bagged with a few holes | Stash the bags for about 6 months |
| Clemson county extension | Piled, watered and turned once or twice a month | 3 months up to 1 year |
| Dublin City Council | Composted on their own in bins or cages | 1-2 years |
| Penn State | Whole leaves piled, packed and watered | A couple of years |
The shortest figure comes from the one source that tells you to shred and bag the leaves. The longest comes from Penn State’s whole-leaf pile. The two middle figures come from setups the sources describe less fully, so treat them as ranges, not promises. If you do not shred, plan on the longer end.
Know when it is ready
Look, smell and feel are the three checks. The Ask Extension answer says leaf mold “is ready to use when it is soft and crumbly to the touch and has an earthy smell.” Penn State’s description of the finished product matches: dark brown, with a pleasant earthy smell and a crumbly texture. If the leaves still look like leaves, or they smell sour, leave them longer, and check that the bag or pile has enough moisture and air.
The Ask Extension answer gives the storage step as “about 6 months” for bagged leaves. The sources do not describe a shelf life for finished leaf mold, so this guide does not give one.
Use leaf mold as mulch, bed material or a compost carbon source
Leaf mold has three uses in the sources. Clemson says to “Incorporate leaf mold compost into landscape or garden beds, or use it as a mulch.” The Dublin guidance lists the mulch job in full: “As a mulch in your garden or around bushes in perennial planting areas to keep weeds down and retain moisture in the soil during drier summer months.” The third use is as an ingredient. The Illinois release says leaf mold “can then be used as mulch or saved as a carbon source for adding to your compost pile” in summer, when brown materials are scarcer.
That third use is worth noting if your pile runs short of dry material in summer. The sources treat leaf mold as a carbon-rich material, which is the role that dry leaves play in a hot pile. The sources do not describe leaf mold as a fertilizer, so this guide does not describe it that way either. If you want a bin of your own for kitchen scraps, see our guide to building a compost bin.
Mistakes to avoid
- Leaving the leaves whole. Penn State and the Illinois release both say shredded leaves break down faster.
- Sealing the bag tight. Penn State advises closing it loosely to allow some airflow.
- Letting the pile dry out in summer. The Dublin guidance suggests covering it to keep moisture in.
- Putting the bin next to invasive weeds. Dublin warns that ivy, bindweed and brambles can invade the pile.
- Expecting a quick result from whole leaves. Penn State gives a couple of years for that method.
How we chose
We chose five pages that name leaf mold or leaf composting directly: the Penn State leaf guide, the Illinois Extension leaf release, the Clemson Home and Garden Information Center leaf page, the Ask Extension answer on leaf litter and leaf mold, and a Dublin City Council leaf mould guidance sheet. The Dublin sheet comes from a council in Ireland rather than a US extension service, so this guide draws on it only for cage sizes and placement, and says so. We left out a 2015 Illinois blog post on leaves because it does not mention leaf mold. We did not use retail, product or hobby sites.
What we could not verify
The pages give practical advice, but they leave some questions open and do not agree on the timeline. This section sets out the gaps.
What the sources do not say
The sources do not give a moisture percentage for leaves, so this guide gives none. They do not say how many bags a yard needs, and the Dublin cage sizes are in metres, with a minimum of 1.5 m and a maximum of 3 m, without a US conversion. The timelines conflict, from about six months to two years, and none of the pages explains the whole range. The Ask Extension answer dates from 2015. The Clemson, Penn State and Illinois pages do not give a leaf-type list for leaf mold, so this guide does not tell you which leaves to avoid. The sources do not describe leaf mold as a fertilizer or give its nutrient content.
Frequently asked questions
Do the leaves have to be shredded?
No source says they must be, but several say shredding helps. Penn State says “Shredded leaves decay much more quickly than whole leaves.” The Illinois release says whole leaves used as mulch “tend to mat together.” Shredding is the easiest way to shorten the wait, so it is the step to do first.
How long does leaf mold take to make?
The sources disagree. The Ask Extension answer gives about 6 months for shredded, bagged leaves. Clemson gives 3 months up to 1 year for piled and turned leaves. Dublin gives 1-2 years when leaves are composted on their own. Penn State gives a couple of years for whole leaves in a pile. Plan on the longer end if you are not shredding.
Should the pile be covered?
In dry weather, yes, according to the Dublin guidance. It says piles “can be covered with black plastic to retain moisture in drier summer months.” Keep the cover loose enough to allow some airflow, as Penn State advises for bags. A sealed pile that never gets air can smell of sulfur, as the Ask Extension answer warns.
What is leaf mold good for?
The sources name three uses: mulch, bed material and a carbon-rich ingredient for a compost pile. Clemson says to incorporate it into beds or use it as a mulch, and the Illinois release says it can be saved as a carbon source for adding to a compost pile when brown material is short. They do not describe leaf mold as a fertilizer.
How can you tell when leaf mold is ready?
Check the texture and the smell. The Ask Extension answer says it is ready when it is “soft and crumbly to the touch and has an earthy smell.” Penn State describes the finished product as dark brown with a pleasant earthy smell. If the leaves still look like leaves, give the pile or bag more time.
Sources
- https://extension.psu.edu/leaves-are-treasure-not-trash (opened 2026-10-22)
- https://extension.illinois.edu/news-releases/dont-rake-fall-leaves-recycle-them (opened 2026-10-22)
- https://hgic.clemson.edu/what-to-do-with-all-the-leaves/ (opened 2026-10-22)
- https://ask.extension.org/kb/faq.php?id=235043 (opened 2026-10-22)
- https://www.dublincity.ie/sites/default/files/2022-10/DCC%20Leaf%20Mould%20Cages.pdf (opened 2026-10-22)